Metroid Prime 3: Quarterly Diaries #13
November 20th, 2009

Areas Covered: Command Center (revisited, again)
Discussion Points: Command Station tutorial, Skyway Access set piece, Pirate Commander, Homeworld pacing
Command Center (revisited, again)
Here we are, back at the Command Center, re-equiped and ready to snuff out the rest of the map, again. We have almost all the tools we need, so on this third time around we can genuinely begin scouting out those hidden missile upgrades. I can’t help but feel a little betrayed that we’ve been teased by these upgrades a numerous times now.
At this point I’m also quite surprised at the length of the Homeworld area, which is probably 1.5 times the size of the other major planets. It’s just long enough that we won’t have the opportunity to cover the remaining sections in this article.
If we head back to Defense Access we can clear the phazon wall (continual practice of the new nova beam/x-ray visor combination) and finally disable the defense system, allowing that jerk-off Admiral Dane and his military men to storm the base. The room just behind the phazon wall, Command Station, is another good example of verticality used well. The room continues the tutorialization of the nova beam and X-ray visor, in a series of climbs and descents, up and down the spiral of platforms. The area is a tangled web and it’s often difficult to discern the next platform, pirate or phazon wall (the latter, part of the power down process). This environment encourages the player to switch between standard and X-ray visors to filter out the noise, whereby the X-ray visor identifies pirates and the elements within the phazon walls, and the standard visor makes it easy to discern the location of next platform. In this way, it teaches the player to operate rapidly between alternative states as the scenario becomes increasingly frantic.
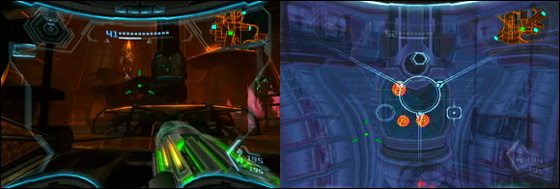
With the defence system disabled Skyway Access is taken off lockdown. The next objective is to rendezvous with Admiral Dane who is appropriately waiting there for us. When you arrive Dane will brief you on the situation before cowering away in his space ship. I’m not sure why, but the notion of this old dude bossing me around, in a Metroid game no less, is a strange anomaly, it just feels offensive. I preferred it when the Galactic Federation were in name only.
Dane equips you with 12 Demolition Troopers dressed in some pretty bad-ass suits. You’re objective is to escort the troops through to a security door which they can then put out of commission, leading the way for the final assault. The sequence is basically divided into a series of smaller sections where the player is given a handful of accompanying soldiers which they must defend, at each interval the soldiers switch up, the goal is to not lose too many of them along the way, however many is never specified.
This sequence seems to ape off the linear set pieces of games such as Call of Duty 4 or Halo. The inherent problem is that Metroid Prime is neither of those games, and whilst the action’s great (due largely to the motion controls and hyper mode mechanic), as a purist I can’t help but gawk at the idea a little. The pumped up music, transit trains which randomly pass through the environment and waves of pirates make it a pretty exciting sequence. There’s little time to fluff about, so hyper mode and the X-ray visor become crutches to lean on. You see, the X-ray visor also has the ability to zone in on the weak points of all enemies, more often than not the face, effecting nailing them in one go with a “head shot”. The sequence is basically a series of regular pirate confrontations, strung together over a few rooms and with a few added variables to watch over. I preferred in ingenuity of the vacuum sequence better myself, but both do well to elevate the action which seems only suitable given that we are in the space pirate’s central base.
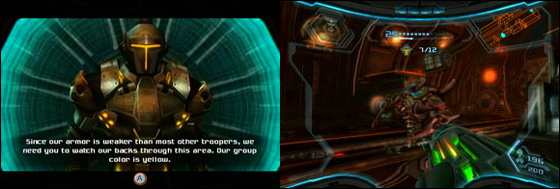
Once you’ve made your way on through, Samus runs into the ultra pink Pirate Commander, the final pirates defence. A series of close up shots in hyper mode make light work of the battle. The Pirate Commander warps between the two side platforms, and then hides behind cover once you’re in close proximity. He plays cheaply making it difficult to hit him. Because of this the player is forced to cheapen themselves too and hyper mode and the X-ray visor are made necessities. All the battle amounts to then is the player trying to land shots on the commander while maintaining enough distance in between before he teleports or hides behind cover. It feels like a rather cheap spectacle. Throughout the battle the player spends almost the majority of their tie in hyper mode, it’s disappointing then that the commander’s minions didn’t try to overload Samus with phazon. This would have likely made the battle more engaging, particularly if the commander joined in too and stopped hiding.
Once you’ve downed the commander, the arena opens up, allowing Samus to land her ship before heading directly to the seed. Before we get that far though I want to discuss the pacing of the Pirate Homeworld which can be documented as such:
Command Center, stealth sequence (linear) -> Research Facility, quiet sequence (linear) -> Elysia revisiting, shift of pace (planet swapping, Steam Lord branching) -> Research facility revisiting, quiet area becomes busy (open paths of entry) -> Command Center, front and backstage collide, Samus retreads the area out in the open (open entry points) -> Phazon Mining Site, setpiece battle climbs the pace (linear) -> Assault, action-heavy sequence (linear)
As we can see the pacing starts slowly in the backstage allowing Samus to expand her ability set before she knocks down the gates and storms the central base. This all comes to a head with a final confrontation with Ridley, which we’ll discuss in the next article.
Metroid Prime 3: Quarterly Diaries #12
November 17th, 2009

Areas Covered: Command Center (revisited), Phazon Mining Site
Discussion Points: “Sticky” map hints, purpose of mining site, Main Cavern set piece, nova beam
Command Center (revisited)
Surprisingly, the time spent back in the Command Center is reasonably short as you blow through a single line of defence (the voltage shield in the Command Courtyard) and cruise on through to another transit hub. Contrary to the little time that needs to be spent here, I actually wasted a lot of time unnecessarily exploring, thinking that I’d have a plethora of new rooms to explore with my updated arsenal, as well as being thrown off by another incorrect map hint.
This time the map prompts points you towards Skyway Access, yet once you arrive security kicks in, automatically placing the room on lockdown, enemies swarm in, a short battle ensues and then a morph ball tunnel diverts you back into a previously explored area (Defense Access). Actually, you’re suppose to use the spider ball to reach the transit station from Defense Access, but the map system keeps hinting you towards Skyway Access (which you must return to later), so like any good Metroid player I trusted what the game’s instructions and got screwed over for it, again!
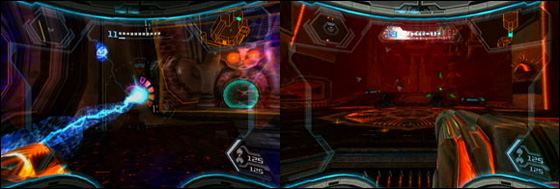
“Sticky” map hints have been discussed previously, and the solution to the problem is very easy: switch them off as soon as the player has entered the appropriate room, furthermore be more discreet in diverting the players attention towards the next, succeeding route. If a room is marked as a hint by the map and the player is required to first enter the room, leave and then return later with some other power-up, then the hints should bend to fit this situation (this has not been the case with the previously stated examples). From my experience, these minor annoyances can quite easily confound into a few hours of time-wasting. Not to downplay the criticism, but relatively speaking, they’re just minor blotches on a overly well paced game. Perhaps other players who don’t over-think things like me wouldn’t have succumb to the same pitfalls. I’m not sure, any comments folks?
Phazon Mining Site
The transit station takes us out to the Phazon Mining Site giving credence to the logbook entries earlier in the game and throughout Metroid Prime 2 where the pirates discussed their intersection with the hazardous catalyst. The Mining Site serves only to provide the player with the Nova beam, the final beam upgrade which will help open up the Skyway Access to lead the invasion a little later. It’s a short linear plough and just like the former sequence and the sequence which follows (an action-heavy set piece), the linearity is used to concentrate the pacing into a steady climb in preparation for the final set piece sequence.
In the first major room (Phazon Quarry) the player can use a touch pad to interface with a huge mining drill to clear a path. There are two areas that can be drilled and, as has been a reoccurring theme throughout the last few posts, either choice yields reward. There is no proper interplay between the player and the drill, making the sequence feel artificial.
Mine Lift, the following room, has Retro again playing with verticality in a well stylized manner. We’ve seen similar sequences before on Elysia and in the Imperial Caverns. Phazon Harvesting, the room just after it sees a little more experimentation too, this time with a Phazon Harvester dealing out massive damage through a pulse beam destined to send you off the narrow set of platforms.
The following section may be difficult to picture if you haven’t played this sequence before, the tail end of this video features the sequence in question. Mind the commentary.
When you reach the Main Cavern you arrive on an upper floor viewing platform overseeing a circular chamber glassed off in the centre. Functionally every room within the mine corresponds to the mining of Phazon ore, the circular room in this case acts as a giant suction tank for the ore chiseled-off from the perimeter outlined with phazon rock. Basically, the pirates chisel away at the walls for a minute or so, an alert signals, handrails rise up from the ground so that the pirates can stay grounded while the suction is taking place. It’s a somewhat unsafe work practice, but the premise makes for one of the most clever set pieces moments in the trilogy yet.
When the player enters the central room, the doors quickly closed off, pirates flood in and four totem poles raise from the floor, ostensibly it’s another clichéd run-in with the pirates. In this state the room acts as something of a stadium for a spectator sport. There’s tunnels for combatants to file in, a viewing platform for onlookers and an arena in which—through the raised totem poles—creates an interesting target/prey dynamic. Trusting my familiarity with the series I safely assumed that once I’d cleared the four initial pirates, everything would be over. After four or five waves of pirates and my first confrontation with the game over screen, I realized this wasn’t the case.
A minute or so into the battle, each of the pirates will rush to one of the four respective sets of handrails and, as mentioned before, the vacuum will begin it’s suction, drawing Samus into the centre and damaging her if she succumbs to the pressure. It’s in these sections where the player must push against the force whilst simultaneously shooting the pirates in an attempt of throwing off their grip and sending them into the vacuum, thereby revealing four weak points which the player can chip away at.
This binary construction creates an engaging attack/defend dynamic between the two states. In the initial state, with totem poles raised, the player must defend themselves from the pirate onslaught whilst at the same time weakening them in preparation for the next phase. If the player becomes too hasty and preemptively kills (!?) a pirate, another one will shuffle in, taking it’s place. It’s integral then that the player finds a steady balance between attacking and defending. The arena is constructed in a such a way—totem poles provide temporary but never full protection from the onslaught and the AI is smart enough to flush you out, forcing the player to constantly adapt to the shifting situation—that it constantly demands the player’s attention.
The second phase inverts the roles of the combatants in this stadium of ours, continually feeding into the attack/defend dynamic. This time, the player’s role is switched and the offensive takes the priority, although defence against the vacuum is still very important. The pirates are vulnerable and the player is free to weaken their grip (no health=loss of grip), yet the player must also be cautious of the inwards pull and at all times have their left thumb pushing the control stick in the opposite direction of the force.
As you can see, the gameplay throughout this sequence is engaging by the way the arena design, enemy AI and vacuum mechanic are constructed to have the player move between roles supporting polar mixes of offence and defence, both of which are dynamic and multifaceted.
Your reward for this area is the Nova beam and the trek to the landing zone from which we can fly back to the Command Center works as a tutorial for this device. The beam works with the X-ray visor to shoot out weaknesses in phazon walls, it’s a nice way to unify the two mechanics, especially considering that the ice and fire properties have already been covered. The beam is also considerably more powerful than the last.
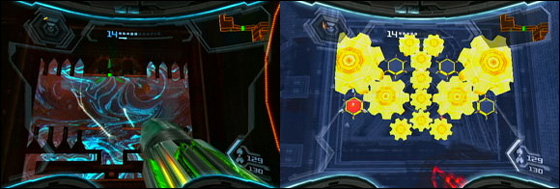
I also noticed that the alarms throughout the Pirate Homeworld pass on from room-to-room Metal Gear 2 style, whereas this may have not been the case in the previous two games. Not sure if my memory serves me well there.
Lastly, it’s somewhere around this part of the game that the log book scans continue to delve into the backstory of trilogy, leading right into the events on Norion, Bryyo and Elysia.
Additional Readings
The Most Stunning Metroid-Inspired Artwork
Metroid Prime 3: Quarterly Diaries #11
November 8th, 2009
Areas Covered: Landing Site Alpha (Elysia), Research Facility (revisited)
Discussion Points: No map prompt to Elysia!, awesome Spider ball and zipline sequences, Steam Lord side quest, rewarding player curiosity, hazard suit, intents of Metroid Hatcher battle
Landing Site Alpha (Elysia)
So where to now exactly? After taking out Gandrayda, acquiring the Grapple Voltage and circling back to the ship, where are we suppose to go next? The map keeps directing me back to a room we’d previously passed, Craneyard, but the centre of the room is closed off by glass, with a lone spider ball track wrapping around the ceiling into the glassed off exterior. Clearly that’s where we need to go which means that we first need to the spider ball, but where to get it? Every time I loaded my save the map hints would prompt me towards the Craneyard room and to no avail could I find the spider ball there, after all it’s just a small room—so I stopped playing for a week and in the meantime finished Eternal Darkness instead.
After my frustration simmered, I referred to the same IGN guide that I’m pinching all of the screen grabs from and realized that you’re meant to go back to a random, undiscovered point on Elysia. Oh…
If you stop off at Landing A on Elysia you can zipline straight on in to the next point with little backtracking in between. This is the perhaps the 3rd or 4th time now that Sky Town has shed its own skin to accommodate the retreading of old ground.
You’ll cross through Zipline Station Alpha on the way to your destination, but we’ll hold out on any discussion for now.
In the next area you’ll use the grapple beam to launch a gear into the air and then, whilst spinning, shoot with an ice missile to launch it back into place. It’s kind of bizarre, semi-Matrix even, but a neat use of the grapple beam all the same. You’ll be rewarded with the spider ball for your efforts. Take note of the stone Chozo grasping the power-up in his hands, he’s a motif from prior games.
As is the case with all weapon upgrades, the player can only exit the room after demonstrating use of the latest upgrade. This opens up a series of external spider ball tracks, presenting fantastic views from underneath the floating spire. The outer area has been severely damaged and worker drones are busily whizzing around the exterior doing their best to mend the broken track. The damage has resulted in crevices which leak fire, this sets up the premise for the player to practice dropping and jumping along the track to avoid said leaks of fire. Once you’ve made your way underneath the structure, the boost ball will help you on the upwards ascent back to the exit. This small area familiarizes the player with the entire repertoire of techniques available when in the spider ball mode. It’s also perhaps one of the most memorable sequences in the game thus far, a juxtaposition of fear and tranquility is created by the tense mid-air suspension and gorgeously sceneric views.
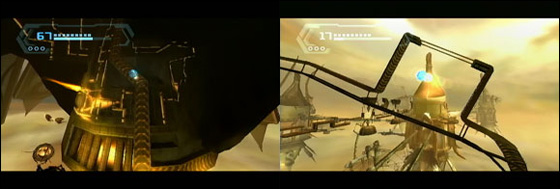
Equally awe-inspiring are the views along the spider track on the tread back to your ship. The camera work here takes full advantage of the surrounding views, capturing wide angles of the windy track in the foreground and the other spires, the rest of the track and the stunning clouds in the background. The versatility of the track design here pushes the boundaries further than in prior games. It’s much more windy with a greater number of intersecting moments for the player to react rather than just follow the track. The same can be said for the majority of other spider ball sections in Metroid Prime 3 too.
When you arrive back at Junction (room title) you can either go left or right—being a junction and all. Now after all those lovely vistas you’ve probably forgotten your way back to the ship, I know I had to stop and think, fortunately both ways are well accommodated. Going right and morph-balling underneath the rubble will put you on course to return to the ship. Accidentally going left will conclude the Steam Lord sub-plot from our first romp through this area, as well as scoring you another energy cell. That is, instead of being punished for making a wrong turn, you’re rewarded for accidentally diverging off course….or exploration even, whatever you wish to call it.
The side quest, of sorts, wraps back into the arena where you took on the Security Drone, neatly incorporating all of your new weapon upgrades too. The grapple voltage is used to activate a lift and overload some fans while the X-ray visor is used in the Steam Lord battle once he turns invisible. Genuis. Again, old material brought back to life through re-application of tools, plus you’re saved from returning here in a fetch quest later on.
Spider ball in tow we can now head back to the Craneyard and zip our way over that glass wall!
Research Facility (revisited)
If you cheapen out and use the transit trains to shortcut your way to the Craneyard rather than take the longer route, you’ll miss out on a number opportunities to nab yourself some extra missile upgrades by using the spider ball on the areas discussed in the last article. Again, divergent paths and supplementary exploration are accommodated for, but in a way which doesn’t impede on the experience of players taking the shorter course. I wonder if this design works for the entire game, whereby all upgrades can be picked up on a single play through just by straying off the conventional path every time you’re presented with a crossroads. My player percentage is quite high—and I’ve accidentally taken the wrong path a several times already—so it seems quite possible.
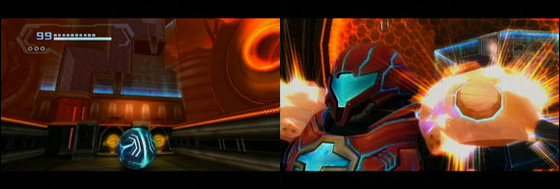
Over the glass and through a few tunnels shielded from the rain and you’ll be presented with a boost ball puzzle which requires you to use two spinners to rotate the sides of a wall to form a connected track. You can actually build the track to either end at the left or the right. Building to the right will reward you with another missile upgrade. Building to the left will take you to the hazard suit. There’s that player divergence thing again.
Funnily enough the hazard suit isn’t a new suit per say (there appear to be no new suits in MP3), instead Samus’ shoulder pads are bolstered in size, giving her the same cloak that shields the space pirates from the acid rain. When you’re in the rain your suit will glow a transparent orange, it’s certainly a cool look. The acid rain too is neat, you’ll notice that if you look towards the sky the droplets of rain splash black on your visor. After you’ve acquired the suit, some pirates will smash the windows allowing you to trawl around in the rain. Here we see the player again familiarized with the latest upgrade before they proceed. I really should write a rule book on these design tricks.
Now that we’ve got the suit we can swing on around to the other side of Metroid Processing. Just through this area is a surprise boss encounter with a Metroid Hatcher. Think of it like a floating octopus. You attack its tentacles and mouth then, whilst stunned, rip them off one at a time. I rather enjoyed this confrontation, partly because I wasn’t expecting it, but predominately because it was treated as a minor boss encounter and therefore didn’t need to superfluously pile on layers of needless complexity. All you do is use your beam and the grapple, very simple and also very gratifying too. It very much plays on the visceral feel of the grapple.
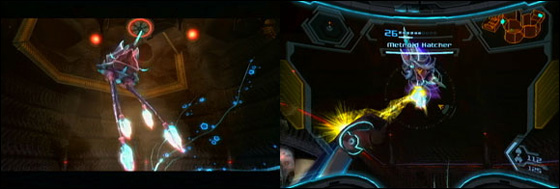
I think the battle was surprising because it seemingly interrupted a puzzle sequence, yet in the end the battle allows the next part in the sequence to be completed. In a way, the hatcher is a trigger for the switch over to the action-orientated half of the homeworld section. We now have all we need to storm the command center, so the hatcher battle, with the tugging of the grapple, the alternating levels of resistance from the tentacles and the vicious attacks (the tentacle spin covers a large distance of the playing field and can therefore be tough to avoid), kick-start the shift in pacing.
In regards to the puzzle, I like the way Retro use verticality in propelling to morphball above ground into the overhanging morphball slots. Very cool.
The next room links to another transit station which loops back around into the second floor of the Command Center, effectively saving he player piles of backtracking. We can see that as with the cannons in Elysia, transit stations are used to alleviate on backtracking and link separated areas.
Additional Readings
5 Ways Nintendo Can Bring Metroid Back to 2D – Racketboy


 Game Design Companion: A Critical Analysis of Wario Land 4 - $7.99
 Level Design: Processes and Experiences
 Speed Boost: The Hidden Secrets Behind Arcade Racing Design - $5.99
 Adventures in Games Analysis: Volume I - $5.99


