Metroid Prime 3: Quarterly Diaries #12
November 17th, 2009

Areas Covered: Command Center (revisited), Phazon Mining Site
Discussion Points: “Sticky” map hints, purpose of mining site, Main Cavern set piece, nova beam
Command Center (revisited)
Surprisingly, the time spent back in the Command Center is reasonably short as you blow through a single line of defence (the voltage shield in the Command Courtyard) and cruise on through to another transit hub. Contrary to the little time that needs to be spent here, I actually wasted a lot of time unnecessarily exploring, thinking that I’d have a plethora of new rooms to explore with my updated arsenal, as well as being thrown off by another incorrect map hint.
This time the map prompts points you towards Skyway Access, yet once you arrive security kicks in, automatically placing the room on lockdown, enemies swarm in, a short battle ensues and then a morph ball tunnel diverts you back into a previously explored area (Defense Access). Actually, you’re suppose to use the spider ball to reach the transit station from Defense Access, but the map system keeps hinting you towards Skyway Access (which you must return to later), so like any good Metroid player I trusted what the game’s instructions and got screwed over for it, again!

“Sticky” map hints have been discussed previously, and the solution to the problem is very easy: switch them off as soon as the player has entered the appropriate room, furthermore be more discreet in diverting the players attention towards the next, succeeding route. If a room is marked as a hint by the map and the player is required to first enter the room, leave and then return later with some other power-up, then the hints should bend to fit this situation (this has not been the case with the previously stated examples). From my experience, these minor annoyances can quite easily confound into a few hours of time-wasting. Not to downplay the criticism, but relatively speaking, they’re just minor blotches on a overly well paced game. Perhaps other players who don’t over-think things like me wouldn’t have succumb to the same pitfalls. I’m not sure, any comments folks?
Phazon Mining Site
The transit station takes us out to the Phazon Mining Site giving credence to the logbook entries earlier in the game and throughout Metroid Prime 2 where the pirates discussed their intersection with the hazardous catalyst. The Mining Site serves only to provide the player with the Nova beam, the final beam upgrade which will help open up the Skyway Access to lead the invasion a little later. It’s a short linear plough and just like the former sequence and the sequence which follows (an action-heavy set piece), the linearity is used to concentrate the pacing into a steady climb in preparation for the final set piece sequence.
In the first major room (Phazon Quarry) the player can use a touch pad to interface with a huge mining drill to clear a path. There are two areas that can be drilled and, as has been a reoccurring theme throughout the last few posts, either choice yields reward. There is no proper interplay between the player and the drill, making the sequence feel artificial.
Mine Lift, the following room, has Retro again playing with verticality in a well stylized manner. We’ve seen similar sequences before on Elysia and in the Imperial Caverns. Phazon Harvesting, the room just after it sees a little more experimentation too, this time with a Phazon Harvester dealing out massive damage through a pulse beam destined to send you off the narrow set of platforms.
The following section may be difficult to picture if you haven’t played this sequence before, the tail end of this video features the sequence in question. Mind the commentary.
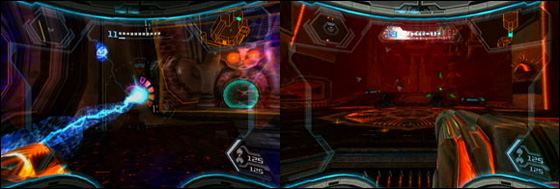
When you reach the Main Cavern you arrive on an upper floor viewing platform overseeing a circular chamber glassed off in the centre. Functionally every room within the mine corresponds to the mining of Phazon ore, the circular room in this case acts as a giant suction tank for the ore chiseled-off from the perimeter outlined with phazon rock. Basically, the pirates chisel away at the walls for a minute or so, an alert signals, handrails rise up from the ground so that the pirates can stay grounded while the suction is taking place. It’s a somewhat unsafe work practice, but the premise makes for one of the most clever set pieces moments in the trilogy yet.
When the player enters the central room, the doors quickly closed off, pirates flood in and four totem poles raise from the floor, ostensibly it’s another clichéd run-in with the pirates. In this state the room acts as something of a stadium for a spectator sport. There’s tunnels for combatants to file in, a viewing platform for onlookers and an arena in which—through the raised totem poles—creates an interesting target/prey dynamic. Trusting my familiarity with the series I safely assumed that once I’d cleared the four initial pirates, everything would be over. After four or five waves of pirates and my first confrontation with the game over screen, I realized this wasn’t the case.
A minute or so into the battle, each of the pirates will rush to one of the four respective sets of handrails and, as mentioned before, the vacuum will begin it’s suction, drawing Samus into the centre and damaging her if she succumbs to the pressure. It’s in these sections where the player must push against the force whilst simultaneously shooting the pirates in an attempt of throwing off their grip and sending them into the vacuum, thereby revealing four weak points which the player can chip away at.
This binary construction creates an engaging attack/defend dynamic between the two states. In the initial state, with totem poles raised, the player must defend themselves from the pirate onslaught whilst at the same time weakening them in preparation for the next phase. If the player becomes too hasty and preemptively kills (!?) a pirate, another one will shuffle in, taking it’s place. It’s integral then that the player finds a steady balance between attacking and defending. The arena is constructed in a such a way—totem poles provide temporary but never full protection from the onslaught and the AI is smart enough to flush you out, forcing the player to constantly adapt to the shifting situation—that it constantly demands the player’s attention.
The second phase inverts the roles of the combatants in this stadium of ours, continually feeding into the attack/defend dynamic. This time, the player’s role is switched and the offensive takes the priority, although defence against the vacuum is still very important. The pirates are vulnerable and the player is free to weaken their grip (no health=loss of grip), yet the player must also be cautious of the inwards pull and at all times have their left thumb pushing the control stick in the opposite direction of the force.
As you can see, the gameplay throughout this sequence is engaging by the way the arena design, enemy AI and vacuum mechanic are constructed to have the player move between roles supporting polar mixes of offence and defence, both of which are dynamic and multifaceted.
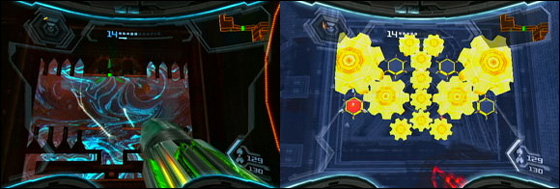
Your reward for this area is the Nova beam and the trek to the landing zone from which we can fly back to the Command Center works as a tutorial for this device. The beam works with the X-ray visor to shoot out weaknesses in phazon walls, it’s a nice way to unify the two mechanics, especially considering that the ice and fire properties have already been covered. The beam is also considerably more powerful than the last.

I also noticed that the alarms throughout the Pirate Homeworld pass on from room-to-room Metal Gear 2 style, whereas this may have not been the case in the previous two games. Not sure if my memory serves me well there.
Lastly, it’s somewhere around this part of the game that the log book scans continue to delve into the backstory of trilogy, leading right into the events on Norion, Bryyo and Elysia.
Additional Readings
The Most Stunning Metroid-Inspired Artwork


 Game Design Companion: A Critical Analysis of Wario Land 4 - $7.99
 Level Design: Processes and Experiences
 Speed Boost: The Hidden Secrets Behind Arcade Racing Design - $5.99
 Adventures in Games Analysis: Volume I - $5.99


