Ruby Passage: The Curious Factory (Game Design Companion: A Critical Analysis of Wario Land 4)
December 16th, 2013
Lowdown
Passage: Ruby Passage
Level Number: 1 of 4
Visual Theme: A factory
Game Idea: Mechanisation and Taylorism
Key Level Elements: Wheel platforms, crushers, decompressors, conveyor belts, rotating platforms
Folding: Reroute
Fold Measures: Frog blocks, pipe
Enemies: Togerobos, Spearmen, Marumen, Totsumen, Kaentsubo
Number of Enemies: 14
Heart Medallion: No
Number of Floating Hearts: 7
Introduction
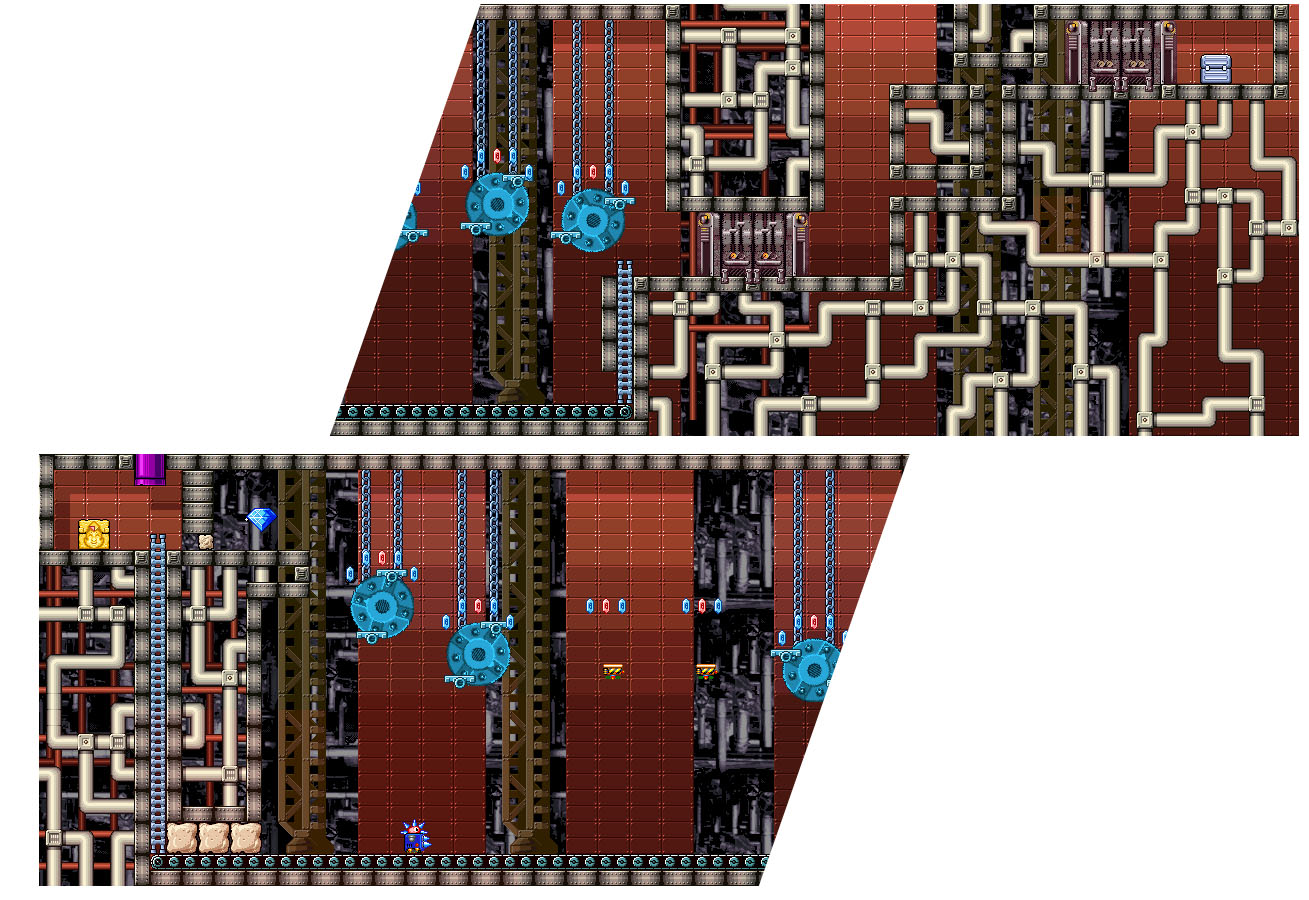
The Curious Factory’s exclusive level elements simulate the mechanical processes of a factory in a varied and engaging manner. Conveyor belts create an opposing force along the ground. Crushers flatten Wario. Decompressors return him to his neutral state. Wheel platforms divide platforming down into a series of smaller jumps, stressing reflex, timing, and adaption skills. The visual theme sets the appropriate tone as well with circuit board walls made of knobs and dials, supported by an underground network of pipes and tubing, all of which are coloured in gunmetal grey and a dingy tan. The path through the level deviates from the standard rectangular shape, rising at the fold before dipping downwards into the basement and looping back around to the vortex.
Game Idea
The game idea for The Curious Factory is that of the factory itself, mechanisation and Taylorism. Mechanisation is the introduction of machines into human processes as apparent through the wheel platforms (jumping), conveyor belts (walking), crushers, and decompressors (transforming). These level elements automate the interactions or, at least, make them easier for the player.
Taylorism is the concept of dividing labour down into its smallest units for economic efficiency. This way, goods can be mass-produced as each worker only needs to repeat the one basic action multiple times. The Curious Factory emulates Taylorism by altering arrangements which would usually be beaten in one or two interactions so as to require a series of interactions. The wheel platforms divide one large jump into several shorter jumps, Flat Wario turns falling into a management of timed sways, and the conveyors—if the player allows them—remove walking altogether. Since Wario is the only worker in the factory, Taylorism ends up increasing the difficulty by giving the player more opportunities to stumble.
Game Idea Timeline
Wheel Platforms: Function as a staircase, function as a transport device, the reset factor – Diagonal rails and verticality, stronger focus on the reset factor – Rotating platforms arranged vertically – Rotating platforms arranged horizontally
Flat Wario: Decompressors implicitly introduced – Restricted introduction of crushers and decompressors – Swaying introduced – Swaying tested
Conveyors: Empty, with a Togerobo – As platforms with Spearmen – As platforms with Totsumen – To trap Wario into transforming – As an express lane to the exit
Room-by-room Analysis
Room 1
Blocks, as providers of risk-free interaction with satisfying feedback, get the player’s attention. In the first arrangement, they put the focus on the ground area to highlight the conveyor belt.
The second arrangement appears simple enough, but simultaneously dealing with the Togerobo and the pull of the conveyor is surprisingly tricky. Let’s pretend there’s just the Togerobo. At any one point, the player needs to monitor at least one of three variables: Wario’s relative position to the enemy (general response time), the time it’ll take the spiked head to roll and hit him (dodging the attack), and the time it’ll take the head to respawn (the window to attack). Factoring in the conveyor belt, the player also needs to be concious of whether or not Wario’s on it and, if so, what effect it has on his relative position. Put the two together and the player can be dealing with two to five variables at any one time. The conveyors add an extra level of engagement to an already challenging enemy.
Considering that Togerobos are on normal ground in Room 2, pairing the robot with the conveyors in Room 1 only creates an initial difficulty spike. Why not introduce the enemy separately?
The leftward push of the conveyor distances Wario from the robot, giving the player more (reaction) time to avoid its attacks.
The second arrangement also demonstrates that enemies are unaffected by the conveyor.
The conveyors slow movement in one direction and accelerate it in the other. Although they modify Wario’s horizontal movement, this doesn’t then affect his jumps. In other words, jumping frees Wario of the traction as a means to resist the conveyors. To some extent, the blocks help introduce this aspect of the conveyors by being in Wario’s way, encouraging the player to jump.
Room 2
The entrance is marked with a decompressor. Because the machine looks fancy, is part of the foreground, and Wario must pass through it, it asserts itself as something important, even though the player doesn’t know what it’s used for just yet.
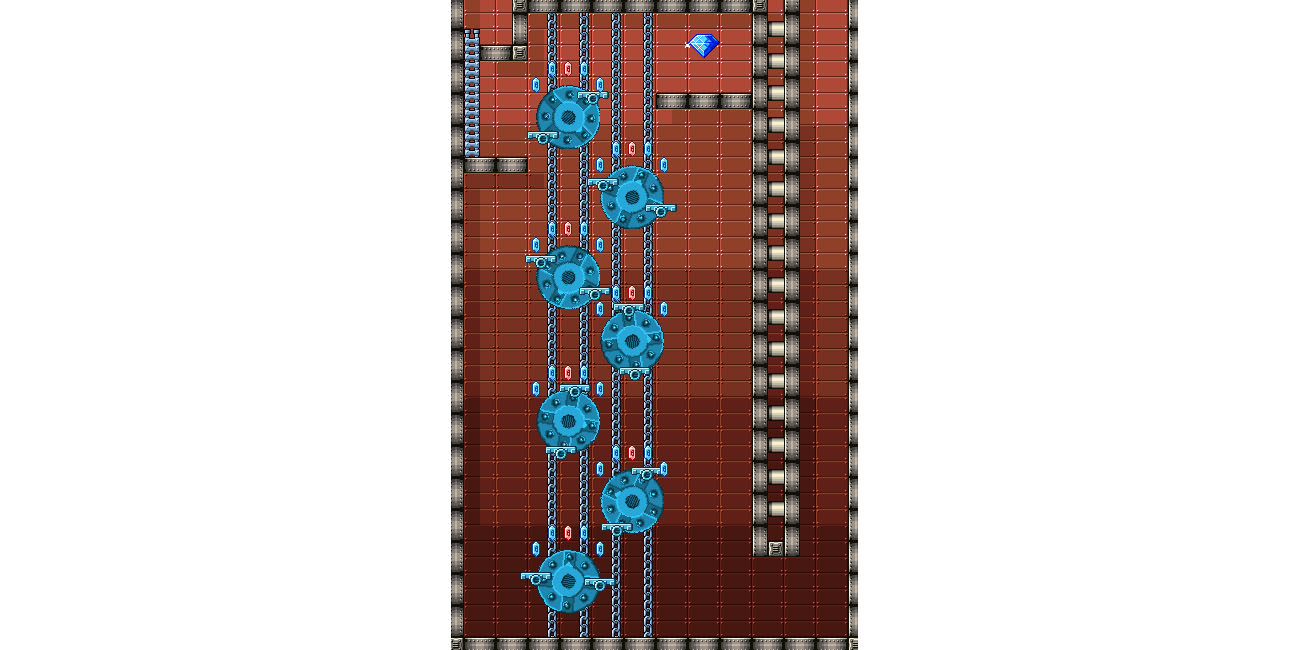
Wario needs to move the wheel platform from one side of the rail to the other in order to reach the upper ledge. Height is the lock and the wheel platform is the key. Experimentation teaches the player how to operate the device (keep jumping on the right-most step). As with the diamond in the Hall of Hieroglyphs’s HEIGHTENED SMASH ATTACK tutorial, the crystals encourage higher, more pronounced jumps, so the player can clearly see the cause and effect relationship. Once at the end of the rail, the wheel platform acts as a staircase.
When standing on the wheel platform’s lowest step halfway along the rail, Wario can touch the Togerobo’s spiky head. The hit box doesn’t extend out to the tips of the spikes. Only if the robot then pops their head off, will it rise enough to meet with Wario’s hit box and hurt him. Rarely do the arrangements inform the player of the hit boxes.
The upper-left arrangement is, like the decompressor at the entrance, a curiosity marker. Depending on when the player draws the connection between Flat Wario and the gap, they’ll either grab the diamond pre- or post-fold. If it’s the latter, the arrangement tests memory skills.
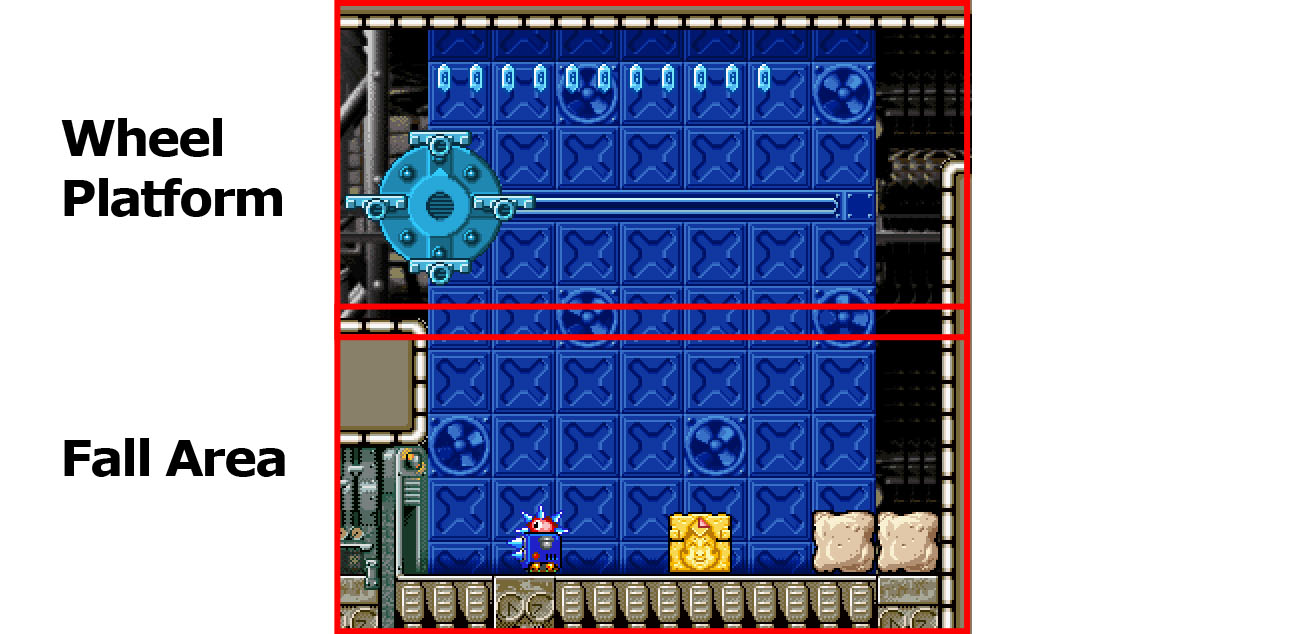
The second wheel platform arrangement uses verticality as both a soft punishment and a means to draw attention to the wheel platform’s reversion to its original position on the rail when it leaves screen view. The arrangement is divided into two rectangular bounding boxes: the wheel platform and the fall area. If Wario moves the wheel platform three rotations or more and falls, its position resets as soon as he enters the fall area. Without the automatic reset, Wario wouldn’t be able to climb back onto the platform and cross the gap. He’d have to manually restart the arrangement by leaving and re-entering the room. The game prevents the player from putting themselves in an unnecessarily difficult situation. The fall area’s screen-tall bounding box ensures that the camera stays vertically still, never revealing the wheel platform when Wario jumps. This conceals the magic trick and prevents the reset from coming off as jarring.
The jewel piece chest ensures that Wario enters the fall area. The crystals are a little higher than before to assist in Wario’s potential fall. The ladder pokes out so as to lure the player downstairs. Although subtle, these elements work together to increase the likelihood that the player will, at least subconsciously, notice the resetting aspect of the wheel platforms
Unlike the first arrangement, the lock is horizontal distance, so instead of acting as a ladder, the wheel platform doubles as a mode of transport. How to operate the wheel platforms, their use as both a staircase and transportation device, and their reversion to their original location when off-screen is all covered in this one room.
Room 3
Flat Wario debuts with the crushers initiating the transformation. The player can avoid the crushers by following their timing and red (active) and blue (inactive) lights. The middle press runs on an alternate timer to the outer pair, making the set harder to avoid. The decompressor is to the right of the crushers so that the player learns how to use the two level elements before advancing. And in case the player avoids the first trio of crushers, the arrangement is repeated on the lower floor. The space behind the wall clues the player in on the secret area.
Returning to Room 2
If the player makes the connection between Flat Wario’s elongated horizontal shape and the unit-gap curiosity marker at the top-left of Room 2, they’ll likely want to backtrack and investigate. It takes quite the intuitive leap though, considering that Room 3 only introduces how to enter and exit the transformation. Post-fold, Wario passes from Room 3 to Room 2 and is likely to get squashed in the process, setting the context for an easier realisation.
To reach the centre ledge, Flat Wario needs to jump and glide leftwards. Only with the added height of the jump can he make the distance. (This is the peak of the transformation’s application). The second set of jumps is a bit easier. The decompressors get the player out of a bind if they mess up. In which case, the punishment is going back to Room 3 and transforming again. The decompressor near the entrance ensures that the player can’t waste time exploring Room 1 as Flat Wario. The top-left decompressor quickens the exit. Post-fold, the arrangement is a trade-off between risk (time) and reward (diamond). Pre-fold, the player has the luxury of time.
Room 4
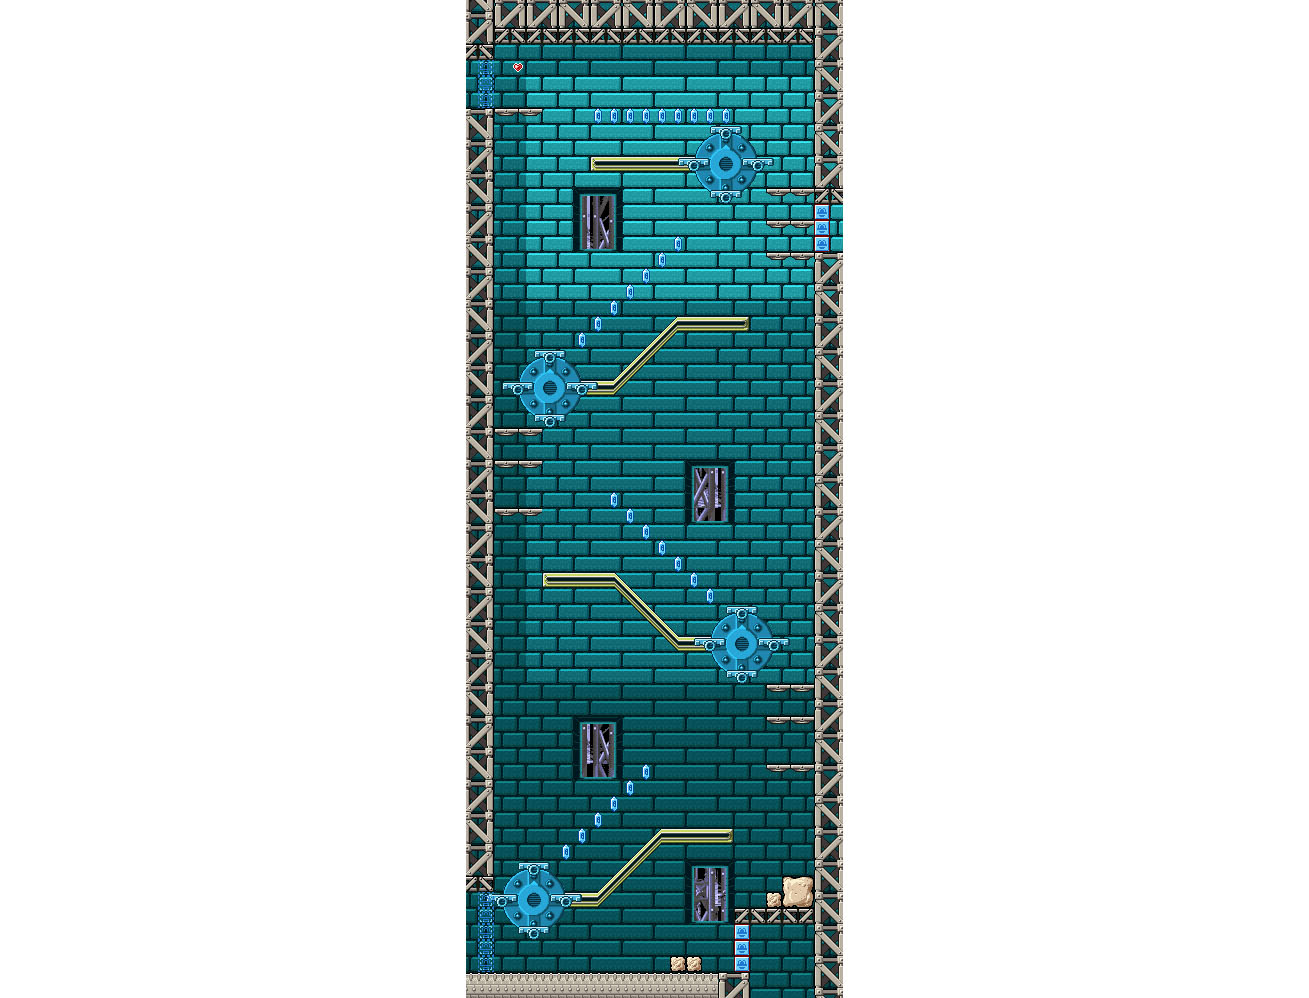
The wheel platform rails are now diagonal and arranged in layers. The crystals bait the player to get Wario up to the wheel’s top step for each rotation. To do this, Wario needs to full JUMP as soon as the wheel platform’s set in motion so as to land on what will be the top step when the rotation ends. The arrangement tests reflex and dexterity as the earlier Wario JUMPS off the front platform, the sooner he can reach the apex of the JUMP and successfully land on the top step. If the player delays, the front platform lowers and the JUMP’s height is undermined.
The window of time that the player has to react is shorter on the diagonal rails as the wheel platform ascends up the rail, meeting the full JUMP’S height. When the wheel platform is on a horizontal rail and doesn’t ascend, Wario’s JUMP isn’t undercut, so the player has more leeway to reach the top step.
Wario can also ride each wheel platform to the end of the rail and then backpedal from the opposite side to reach the crystals. This second approach trades time for ease.
The multiple layers make the resetting aspect of the wheel platforms more apparent. The wheel platform directly below Wario returns to its original position once he reaches a height where he can’t easily bring it back into view. Although this can be somewhat jarring when Wario falls and the player sees all the wheel platforms they moved in their default locations, with no need to backtrack, most players won’t notice it. If Wario falls off the first wheel, where he can’t get out of the screen’s view to reset its position, the unit blocks on the floor can be used to reach the ledge and, from there, the wheel platform.
Room 5
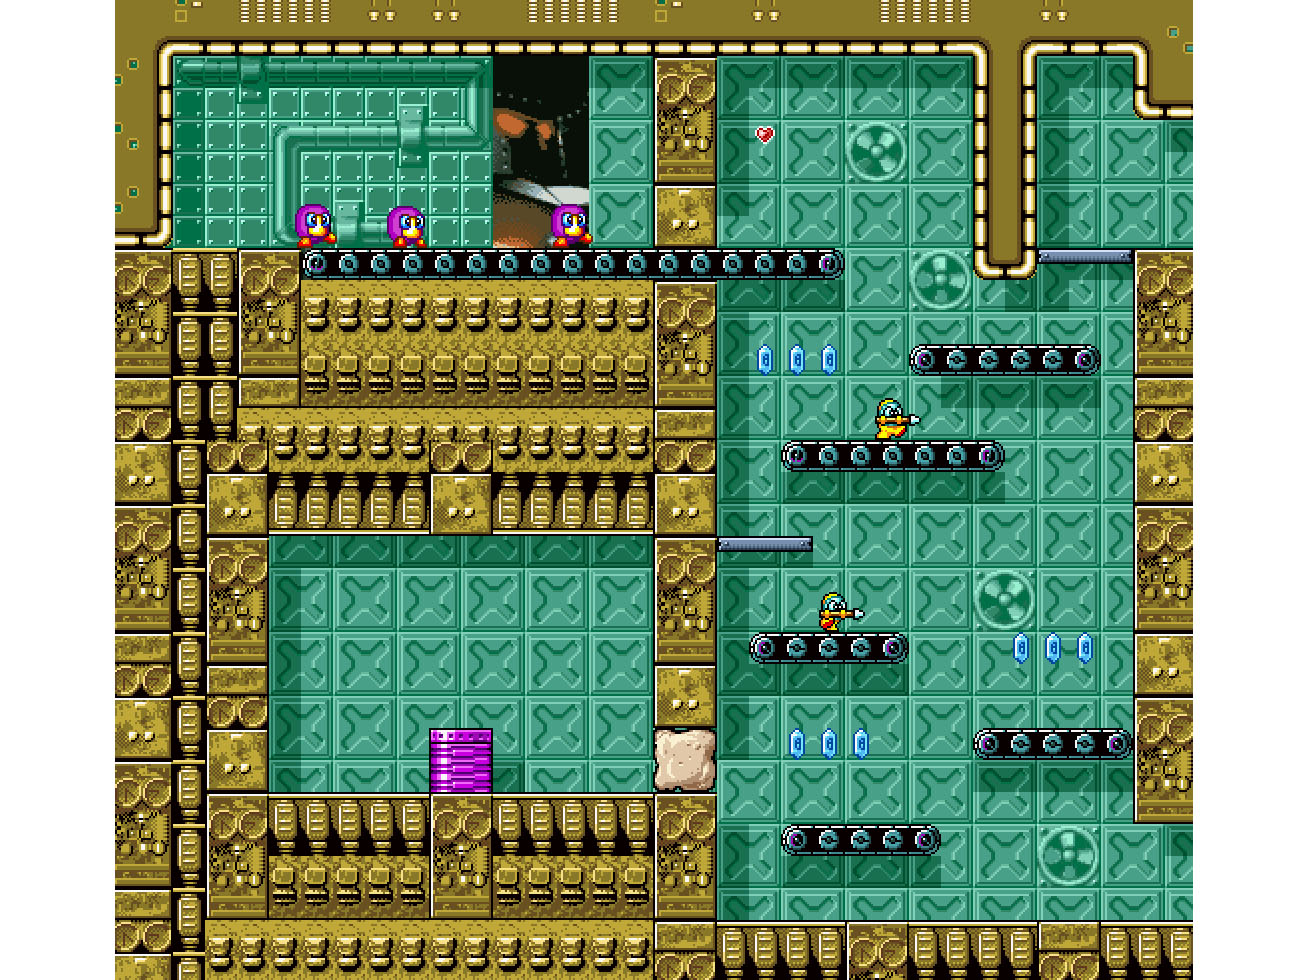
The Spearmen on the conveyor platforms test timing skills. The arrangement more clearly asserts the lack of influence that the conveyors have over enemies.
There are two secret areas. Both require that the player identify the visual outliers, the block in the wall and the conveyor belt running into the wall.
Room 6
Room 6 has three sections: the upper, mid, and lower arrangements. Each section is confined to a rectangular, screen-tall bounding box. The upper arrangement is a variant of the conveyor belt theme. A Totsumen is placed on the first conveyor belt platform for the following reasons:
- With Wario and the Totsumen sharing the same small platform, Wario will almost invariably be in the enemy’s range. So once he lands on the platform, the player has to quickly react to the forthcoming charge attack.
- Simultaneously dealing with the enemy and the conveyor increases engagement.
- The player can lure the Totsumen off the platform to scale the arrangement.
- Being closer to the ladder reduces potential backtracking.
The conveyor belt arrangements are fleshed out through the addition of enemy types. From the slow-moving Togerobos to Spearmen and the nimble Totsumen, the enemies become increasingly confrontational.
In the lower arrangement, the two raised segments divide the floor into unequal thirds. The Kaentsubo debuts next to a fire block. The form of the two game elements does all the hard work for the player. Once again, a gap behind a wall tips off breakable terrain. This time though, it’s made of thick block. The raised segments create the impression that there isn’t enough runway to DASH ATTACK. The player must think outside the box and have Wario momentum jump over the right-hand segment to build enough charge to break the block. Pushing the perceived constraints yields access to Room 6.5.
In the upper arrangement, the frog block wall, which prevents Wario from advancing, leads the player to search for the frog switch and thus go against the custom of avoiding pits. The player is taught to challenge the conventions of the platforming genre.
Room 6.5
The wheel platforms are no longer attached to rails, instead, they spin independently on the spot. The close proximity of these two-step rotating platforms ensures that there’s always a nearby platform waiting for Wario on each rotation. The fast rotation speed shortens the time the player has to jump (reflex). The fixed rate of the cycles gives the player a pattern to follow (timing). Because the platforms still move as Wario’s jumping, the player needs to track them while he’s in mid-air (knowledge). For this reason, JUMP is the most appropriate mechanic as it allows the player to guide Wario to his landing (dexterity).
If Wario stands on the left edge of the top-most rotating platform, he’ll clip the corner of the ceiling and be pushed back into position*.
The Fold
The fold is a reroute, sending Wario down to the factory’s basement. Frog blocks play their usual role. The platform with the frog switch leads Wario off to the right so that the player doesn’t miss the jewel piece chest. The ladder creates negative space (where the player is only holding the up arm of the d-pad) which draws attention to the timer and fuels tension. The Kaentsubo can only worsen the situation.
Room 7
The platforms only slow Wario’s fall. The holes are wide enough for the Totsumen to easily descend the floors if it charges into the wall or is bumped downwards. Wario will invariably be flattened as the conveyor slows his escape. The conveyor belt and Flat Wario game ideas combine.
Room 4
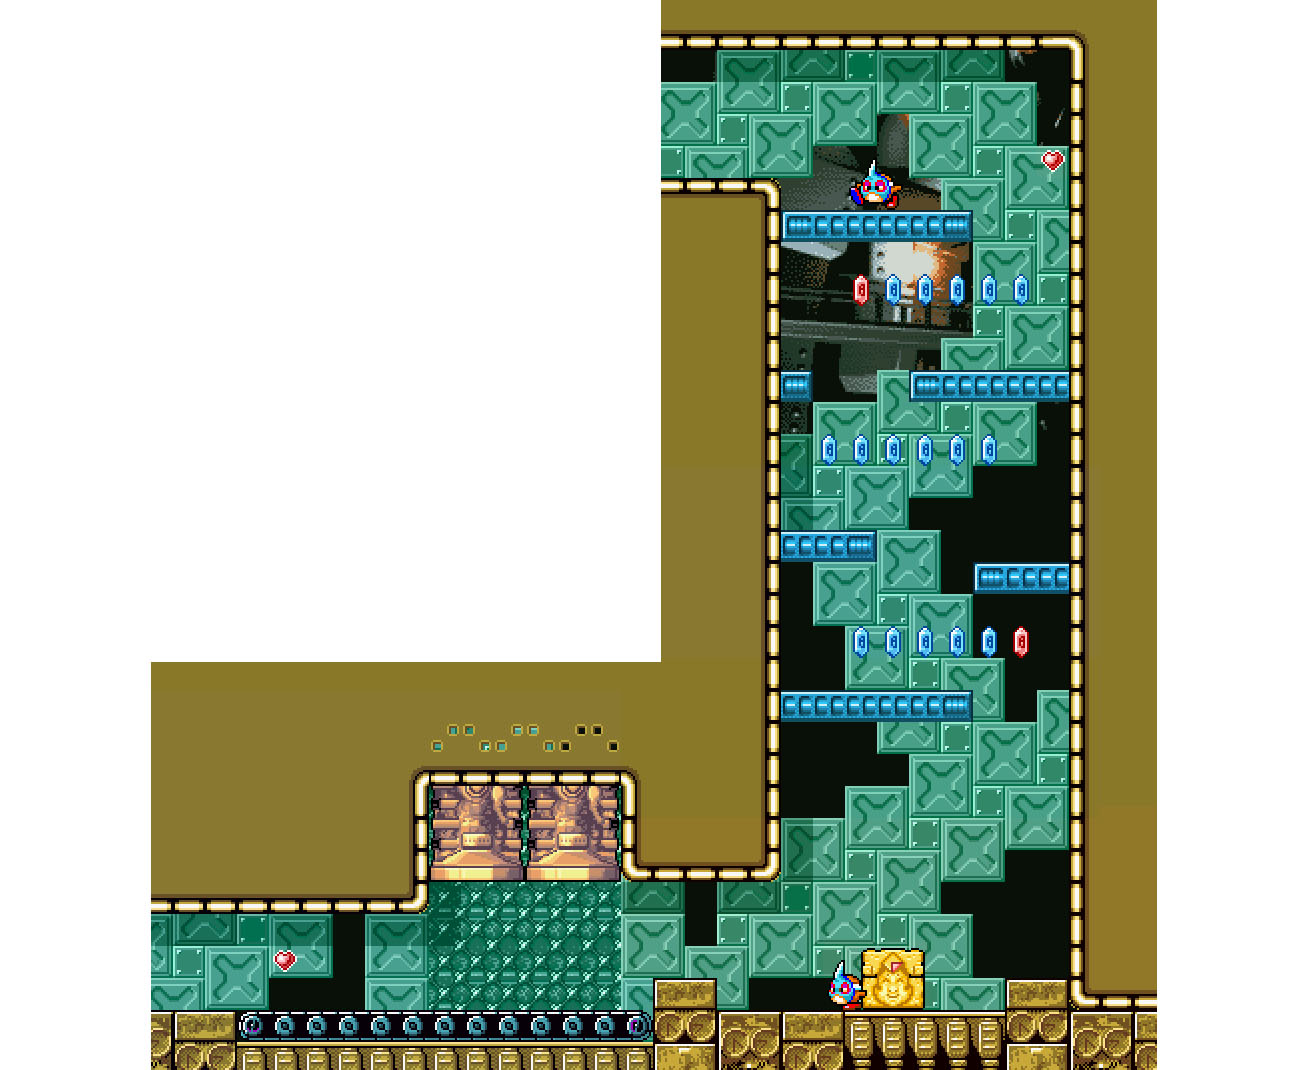
Room 4’s height compounds Flat Wario’s agonisingly-slow fall, building tension under the post-fold timer. When the player’s wishing Flat Wario would hurry up and reach the ground, they have nothing to do and are likely to respond by pushing buttons to see if they can make him fall faster. This, in turn, allows the player to realise that they can control Flat Wario’s sways, something which they haven’t had the chance to figure out thus far (ignoring the backtrack to Room 2). The long drop gives the player ample time to familiarise themselves with the mechanic. The wheel platforms and leftover crystals are obstacles and rewards which persuade the player to sway in specific directions, building up competency. The transformation, post-fold timer, and position of the entranceway give the wheel platform arrangements renewed purpose.
Although Flat Wario can steer the wheel platforms, the grey ledges against the walls are separated enough that he can’t ascend them, preventing the player from needlessly climbing all the way back to the top. Regardless, the upper entranceway is sealed with frog blocks.
Room 8
The sway mechanic practice is put to use as soon as Flat Wario enters the room. Landing on the platform nets the player a CD. If they swing too early or too late, Flat Wario hits the wall and bounces back. It’s all amount timing, remembering the trajectory of the swings, and foreseeing Flat Wario’s fall.
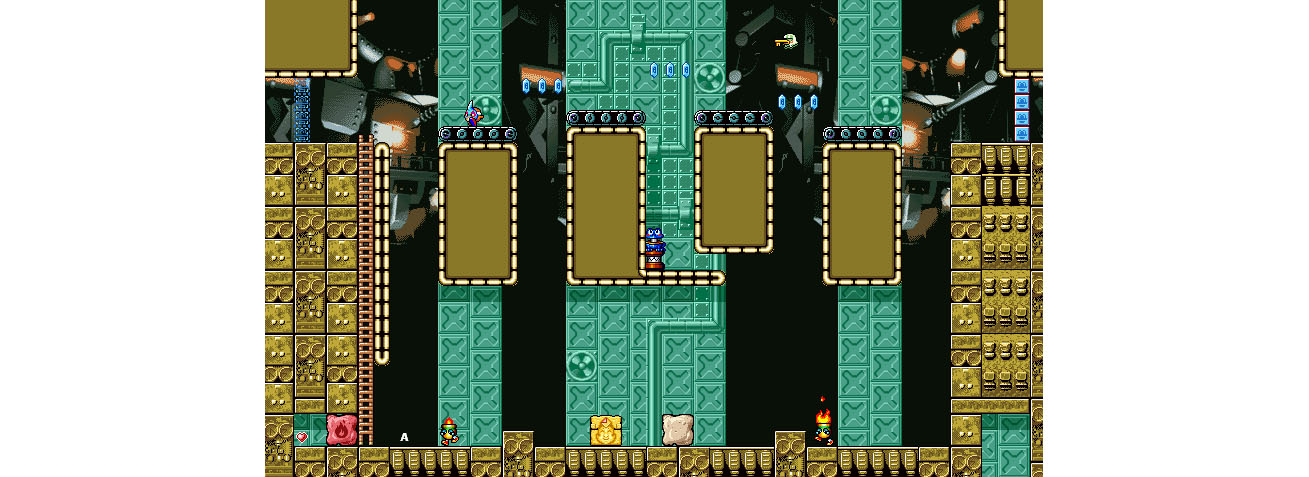
In the main area, the rotating platforms are arranged horizontally. Arranged vertically, the lower platforms catch Wario’s fall, minimising backtracking. Arranged horizontally, all falls lead to a restart. The punishment is greater. The conveyors, pushing to the right, speed up any backtracking. The ladders add tension through negative space. The two industrial platforms mix up the arrangement to keep the player on their toes.
The player can neglect the rotating platforms, however, the tall ladder and pull of the conveyor against Wario remove any time advantage. Taking the upper route not only requires less time, but rewards the player with crystals and a diamond. The benefits are twofold.






 Game Design Companion: A Critical Analysis of Wario Land 4 - $7.99
 Level Design: Processes and Experiences
 Speed Boost: The Hidden Secrets Behind Arcade Racing Design - $5.99
 Adventures in Games Analysis: Volume I - $5.99


